Monday, October 1, 2012

Silhouette Tutorial

Some of my favorite images involve silhouettes, a photo in which the subject is underexposed to the point where most defining features are completely black.

The easiest way to do this is by placing your subject in front of your light source, then shooting toward said light source.  {Please note that best way to achieve a silhouette is by shooting in manual mode.  Don't know how to do that?  Check out my ebook, Making the Mamarazzi.}  So  like I said, place your subject in front of your light source.  It could be a window, the sun, etc.


In the above example I put my beautiful friend in front of her bedroom window.  Now, this next part takes a bit of practice because you have to ignore all rules of exposure here.  You will want to make sure your ISO is at the lowest it can go because you want your light sensor letting in less light than if you were to expose properly.  Now for your aperture it is totally subjective, but I usually keep mine at f/2.0, that is my preference so you go with your gut here.  Now here is where it gets tricky.  You are in complete control of your shutterspeed.  You will have to play with it a bit to see how underexposed you will want your subject.  Usually with silhouettes, the darker the better. 

Just a quick note, in manual mode, you control what you use to expose your image.  I expose my images based on my subject and not the whole image, so basically I tell my camera to read the light around my subject, not the whole scene.   I wish I could go into full detail here, but that would take some time and it's all in my book (another shameless plug).  


In this shot, the sun was in front of my subjects and I was shooting toward it.  So not only did I get some fun flare, I was able to expose my image to create the silhouette.  My shutterspeed was faster (open less time) than if I were to properly expose this image.


This shot is one of my all time favorite images.  The sun was just about to set and my dear friends were already silhouetted nicely, so I grabbed my camera and shot!  It turned out amazing and such a fun souvenir from our Hawaii trip.

If you notice, many times when you attempt a silhouette, you lose details from your subject, but gain details from the background.  So often the background becomes lost and blown out because it's so much brighter than your subject.  When you underexpose your subject, you see so many more details such as clouds, the blue of the ocean, or the horizon.  It's a fun tradeoff to play around with.  

Now, I have to admit that I have faked it a time or two as well.  My girlfriend wanted a few belly shots in front of the sunset at my lake cabin, she wanted them silhouetted similar to the shots I took of her and her husband in Florida.  Only problem?  The sun does not set on our side of the lake, but instead behind our cabin.  No problem!  I can fix that!


I still took my shot (first photo) and underexposed my beautiful friend.  Once I uploaded into photoshop, I added some sunflare to fake the sun in the background.  I did a few more manipulations to get to my final image and voila, instant sunset silhouette!  The magic of photoshop is endless!

Now get out and practice!  Have fun with it.  Put your little one in front of a window reading a book, or jumping for joy in front of the sunset.  Capture those little moments with a little more "flare"!  

Got questions?  Feel free to leave me a comment!  I love hearing from you.


Friday, September 21, 2012

Free! Yes, I said Free!

Who doesn't like free? I'm in a fall type of mood today with the colorful trees and cooler weather, and it being the first official day of fall and all!  I even went so far as to turn my fire place on this morning! It's crazy to think that last week it hit the 90's, ouch! 

In honor of fall and all the amazing pictures you'll be taking from here on out, I designed a few fall cards for you to download and use!  They are 4x6, so you can insert your photo/s then send off to Costco and print them for only pennies!  You can send them out to all your friends and family in honor of this fantastic season.  

There are 3 for you to choose from, pick one, or pick them all!  I've included both png and psd files for you.  Please see this tutorial if you are having trouble inserting your photos.


Click HERE for the files and all the files offered for free here on Making the Mamarazzi!  Enjoy and share!

Monday, September 17, 2012

Photographing Nature

Later this week I am teaching a photography class to the kids in our homeschool cooperative, with the focus being on nature.  I don't claim to be an expert at the photographing nature, but I do find beauty in it and do enjoy capturing it now and then.  I like to try to step out of my comfort zone with it to create visually appealing photographs that anybody can enjoy.

I'm going to share some tips on how to take better nature photographs.  These aren't going to be revolutionary by any means, and I'm sure you can Google "nature photography" and find a wealth of information, I just want you to get out there and start thinking of how to do it better :)

1.  Brown IS pretty.  Just because it's the dead of the winter doesn't mean things aren't beautiful.


2.  Find a new perspective. 

3.  Step closer.  There is more than meets the eye.  These fungi may look ugly to some, but they are truly beautiful.

4.  Textures are key.  You can find texture in just about anything in nature.  Moss, tree bark, a smooth stone or the veins on a leaf.  


5.  Find a focus.  Decide on your focus, do you want the whole flower in view?


Or just part of it?  It's perfectly fine to crop out some of the subject, it can create a more dramatic effect like the sunflower below.


6.  Think outside the box.  This sunflower was far from blooming, but in my mind it still created a beautiful subject.  The color is vivid, the textures are rich and you can see the tiny details.  


7.  Take a step back, the landscape can be incredible.  You can capture a full story and scene by just taking a few steps backward.


8.  Take a few steps in, or in other words, zoom in.  This stump was otherwise boring, but the rings and split make it much more interesting.  Look close and you will find something interesting, I promise.


Do you have any tips to share here?  Leave a comment!  I'd love to hear your ideas.  No go out and channel that inner-mamarazzi!

And because I really like you, here is a free printable for you.

This is full resolution.  It was taken by me in Oahu in 2010.  This would make a lovely print for a bathroom, bedroom or a cabin!  Enjoy.

Sunday, September 16, 2012

Making the Mamarazzi E-book {NEW PRICE}

When I began writing my book, I had grand visions of it being readily available to anyone who wanted to learn to be a better photographer for their family.  My pricing was based on several factors, one of them being that I wanted to be priced lower than other photography e-books and workshops out there.  I've always strived to be affordable for my clients and after giving it much though, I've decided to lower the price of my e-book to $50.  I realize that $95 is steep for some people out there, especially since buying this book is not a "necessity".  I hope that you will find the new price to be much "friendlier" to the cause.  If you have purchased it already I have refunded you a portion of the original price. 

Head on over and buy it for the newly reduced price!  YAY.


Add to Cart

Thursday, September 13, 2012

The little things...

"Live your life each day as you would climb mountains. An occasional glance towards the summit puts the goal in mind. Many beautiful scenes can be observed from each new vantage point. Climb steadily, slowly, enjoy each passing moment; and the view from the summit will serve as a fitting climax to the journey."

-Harold V. Melchert


When you focus only on the big picture, you tend not to notice the little things and the beauty that lies within them.  Never forget the journey and the scenes that are unfolding before your eyes.

Wednesday, September 12, 2012

Photobooth Template {Photography Tutorials and Photoshop Templates}

I'm sure you've seen these photobooth templates floating around the world wide web. I love using them to showcase my instagram photos as well as the photos I take with my real camera. It is a fun way to tell a story and super easy!


I've made a template for you to use too! Click HERE to download the link for the photoshop file.  Unfortunately the only program I use is Photoshop, so unless you have this program, you won't be able to use it.  

To create your own photostrip, open the file into Photoshop, go to "file" and "place".  Choose the photo you want to insert and fix the size of the photo.  Once you have it in order, double click the photo onto the square you wish it to be on.  Make sure in the layers palette that the file number is above the right box.  Once you have it all in place, go to the "layers" menu, then click on "create clipping mask".  VOILA, you may need to adjust the placement of the photo but otherwise, all you need to do is continue adding your photos.  Once you've added all of them, flatten your image and save as a jpg.  You have your very own photostrip!  

Now go on!  Go have some fun.

First Day of School {Photography Tutorial}

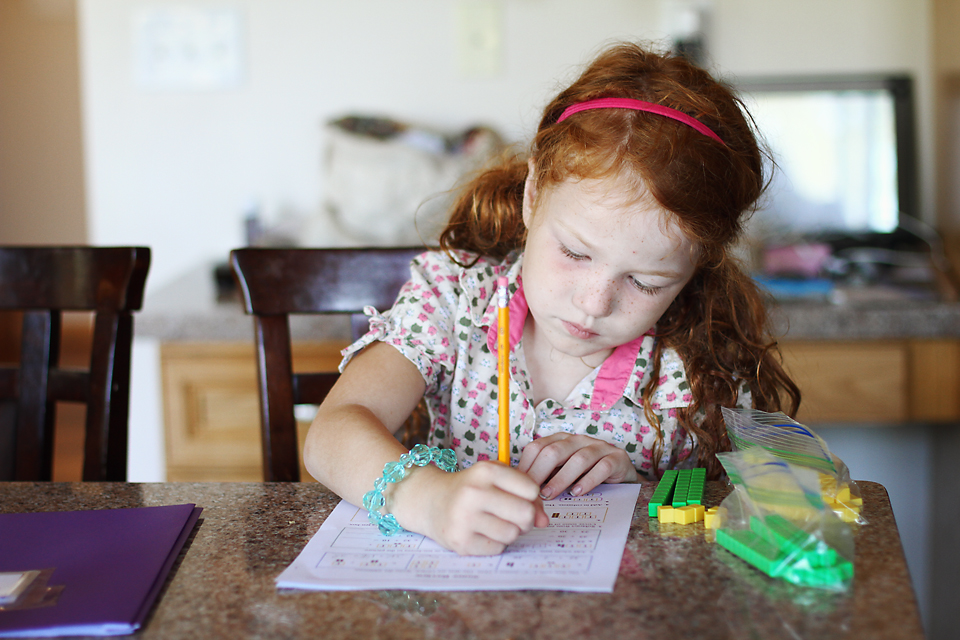
My family and I began our homeschooling journey recently and I knew that I wanted to capture the details of that first day.  I had to walk a fine line since I was playing a few roles that day; mom, mamarazzi and teacher.  I needed to be there to guide the kids, but I wanted to sit back and photograph them silently.  Lucky for me though, my kids are so used to my camera that they altogether ignore me most of the time :)


How did I accomplish this? First of all, act like a mamarazzi!  Be sneaky, don't say "Jonny, look here",  just observe and snap away.

You have nothing to lose, shoot from every angle, step back, change your perspective, zoom in.  You can do this!